Making Brigandine Leg Armor
For those who want to make custom-fitted armor but don’t have access to an armoring shop, these leather brigandine legs can be made using basic tools without any special equipment.
To make them, you will need the following supplies:
Materials:
- A silver sharpie for marking the leather
- Posterboard for making the pattern
- Garment-weight leather (5-7 oz), about 5 square feet
- 1 yard of heavy fabric to line the leather legs: cotton canvas, denim or linen all work.
- 12-oz aluminum sheeting for the plates
- Lots of rivets, preferably 200 rivets so you have a few extra. We used the Medium Double-Cap Steel Rivets from Tandy Leather; others have used old-fashioned rivets with washers, or even roofing nails.
- @3 feet of Leather strapping for the buckles and straps. We used black ¾ inch cowhide strips from Tandy.
- 4 buckles for the straps. We used center bar roller buckles from Tandy.
- Brads (from Office max—they are the two-pronged metal things put through the holes in notebook paper to hold bunches of paper together)
Tools:
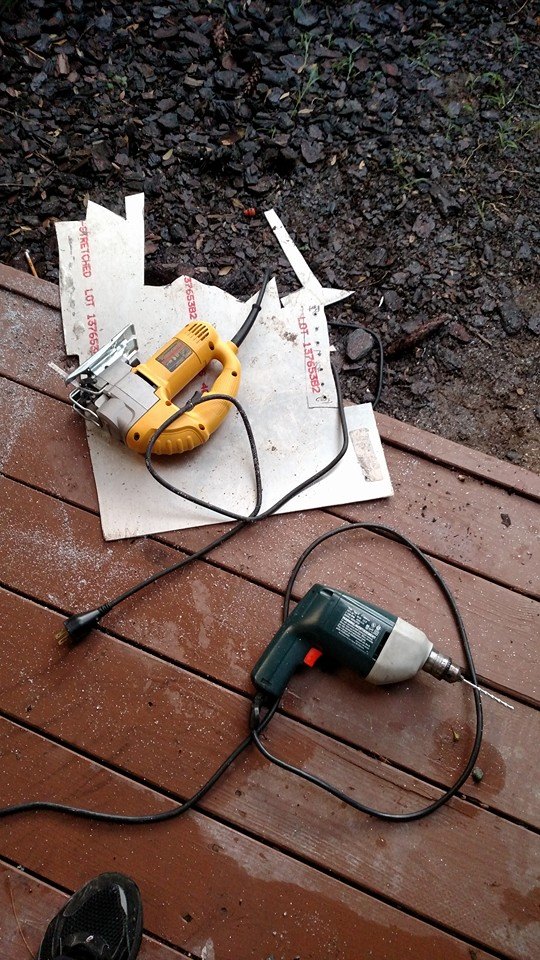
- A jigsaw with a metal-cutting blade
- A good drill
- A belt sander and 80-grit sandpaper
- Tin snips
- A reamer
- A rivet setter
- A sewing machine with a leather needle and heavy-duty upholstery-weight thread
- A scratch awl
- Leather contact-cement glue
- Scissors
Step 1: Make the Pattern
Using posterboard, paper, cardboard or other material, wrap it around your leg and create a pattern for the leg armor. The highest point of the leg should come to the outside of the hip joint. Make sure that the top of the leg armor is low enough that it doesn’t dig into the top of your leg or crotch area at any point. The edges of the leg should meet at a point between the back of the leg and the inside of the leg. There should be about an inch of space between the edges of the leg.

Once you have your pattern, mark the front center line and the back center line. Wrap the pattern around your right leg and label the outside “right”. Flip the pattern around, wrap it around your left leg and label that side of the pattern “left”. This will be the pattern for the leather legs.
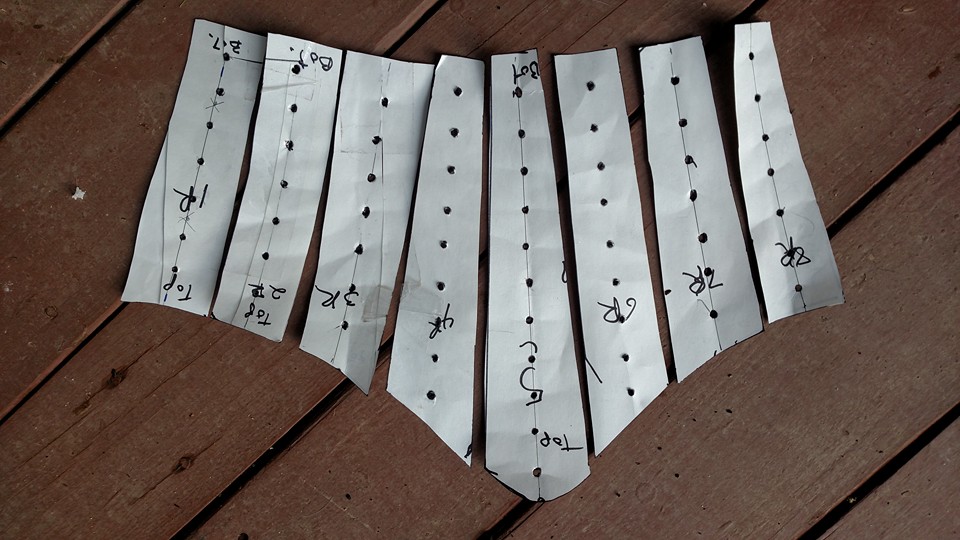 To create the pattern pieces for the metal plates, trace this pattern on some more poster board. Draw a line ½ inch inside the original pattern, and draw vertical lines dividing this into 8 roughly even pieces. The metal plates should have ¼ to 3/8 of an inch of space between them. Cut out the pieces for the metal plates, numbering them 1 to 8. Label one side of a pattern 1L, flip it over, and label the other side 1R. Label the top and bottom of the pattern pieces as well. Then draw a line down the center of each piece and, starting ½ an inch from the bottom, mark a hole there. Measure up 1 inch and mark another. Continue marking a hole every inch until you get to the top. Punch out the holes with a nail or needle, and expand the hole with a scratch awl.
Cut out the plate pieces and lay them on top of the posterboard pattern for the leather leg. There should be half an inch of space around the edges of the leather leg pattern, and ¼-3/8 of an inch of space between the plates.
Make the leather legs
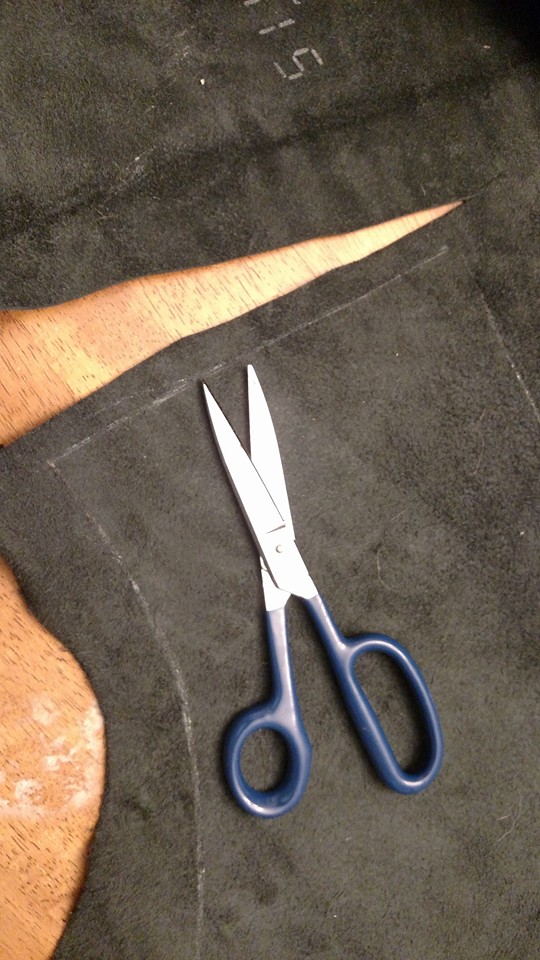 Lay the leg pattern down on the inside of your leather and draw around it with a silver sharpie. If the side of the pattern pressed against the leather said “Right”, label this piece “right”. If it said “left”, label this piece “left”. Transfer the markings for the center front and center back from the pattern onto the leather.
Cut out the leather piece about half an inch outside the silver lines.
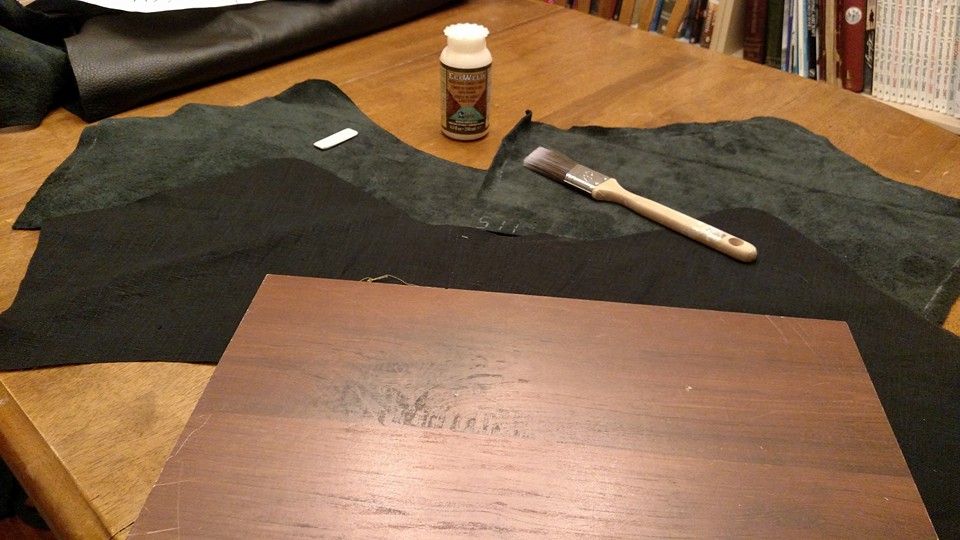
Lay the same leg pattern down on the lining canvas/linen fabric. Draw around the edges of a pattern with a pencil, and cut on this line. There is no seam allowance for the lining.
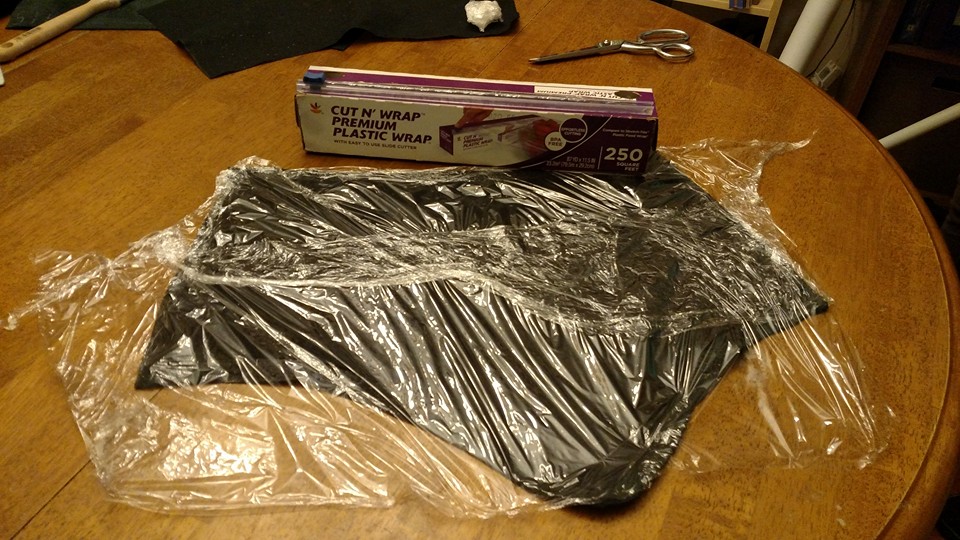
Cover the inside of the leather piece with contact cement, out to the silver sharpied lines. Lay the linen onto the inside of the leather leg piece, matching up the edges of the piece with the silver sharpie lines. Put a piece of saran wrap over both pieces and rest a heavy weight on them for at least 5 minutes. Take the saran wrap off and let the glue dry.
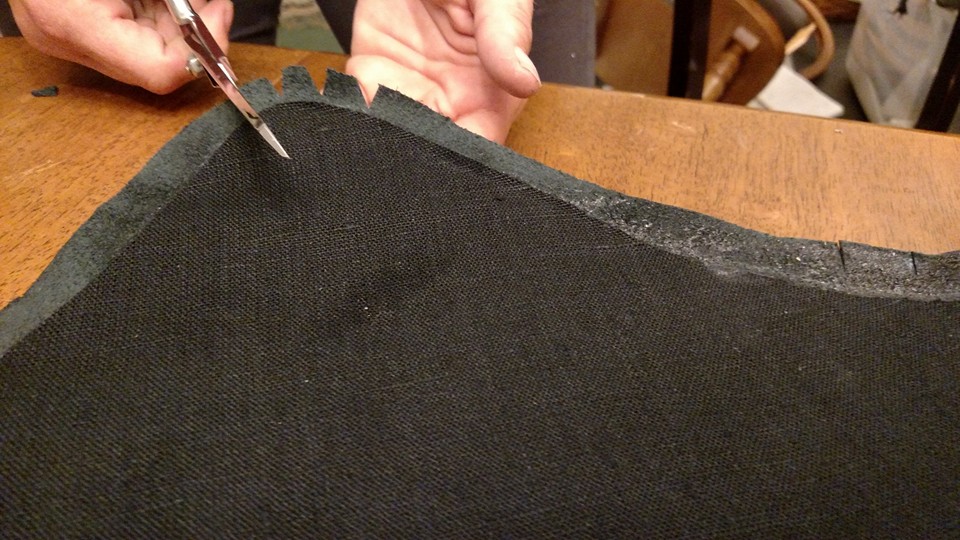
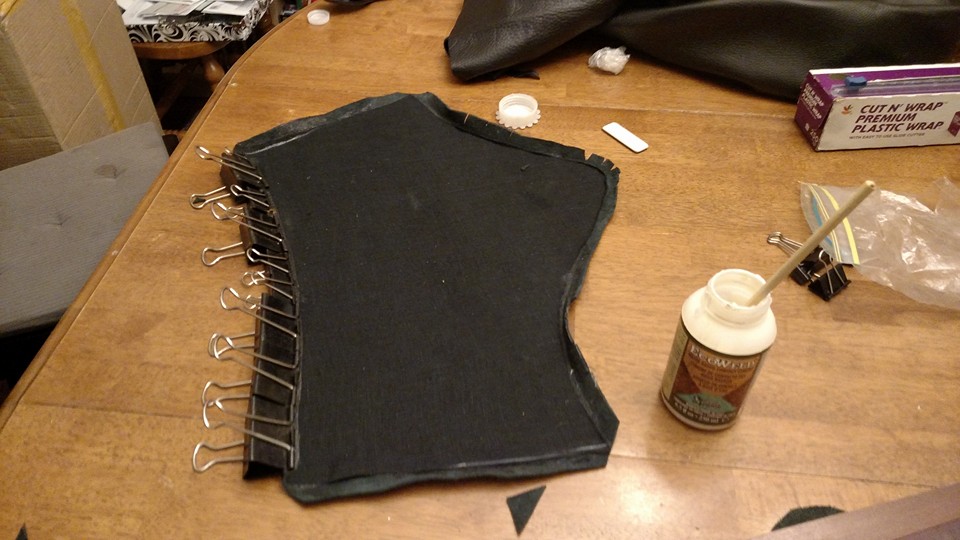
Where the leather curves in, cut snips in the leather just to the linen lining. Where the leather curves out, cut notches. Brush contact cement onto the edge of the leather, and fold it over the linen and press it into place. We used clips to help hold the leather down as it dried.
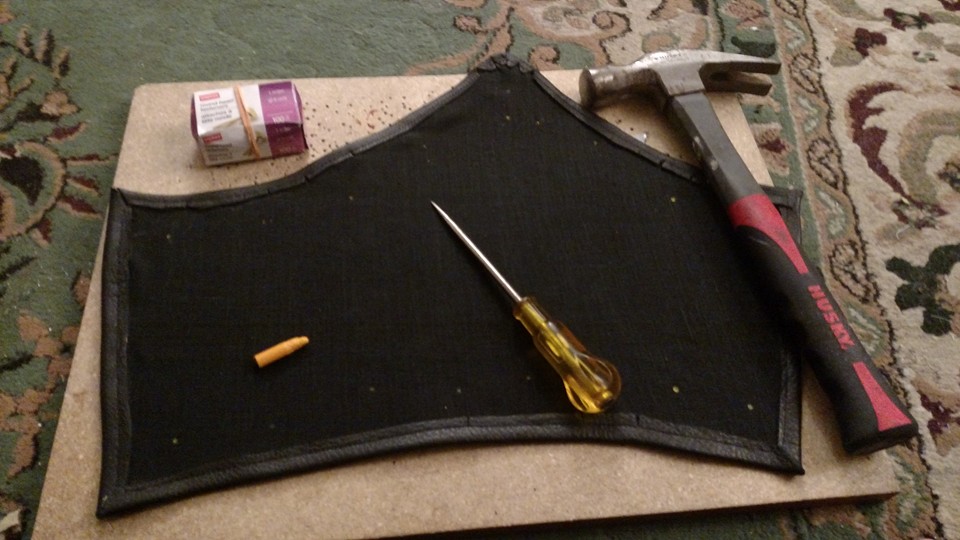
Once dried, sew the leather edging down. Use a leather needle in your sewing machine with heavy duty upholstery thread, and use a long stitch (4-stitches per inch or longer) to avoid perforating the leather overmuch. Stitch around the edges of the leg ½ to 3/8 inches in from the edge, stitching the leather edging down to the linen.
Make the Aluminum Plates
We used aluminum because we didn’t have the tools for cutting and shaping steel.
The aluminum sheeting will be covered with a layer of plastic on both sides. Leave this on until you’re actually riveting each piece to the legs.
For each pattern piece, lay it on the aluminum and trace around it with a sharpie. Mark the holes down the center of each piece with a sharpie as well.
Flip the pattern piece over and repeat. You should end up with sixteen pattern pieces. Where possible, line the pattern pieces up on the aluminum so that you can cut as many straight lines as possible.
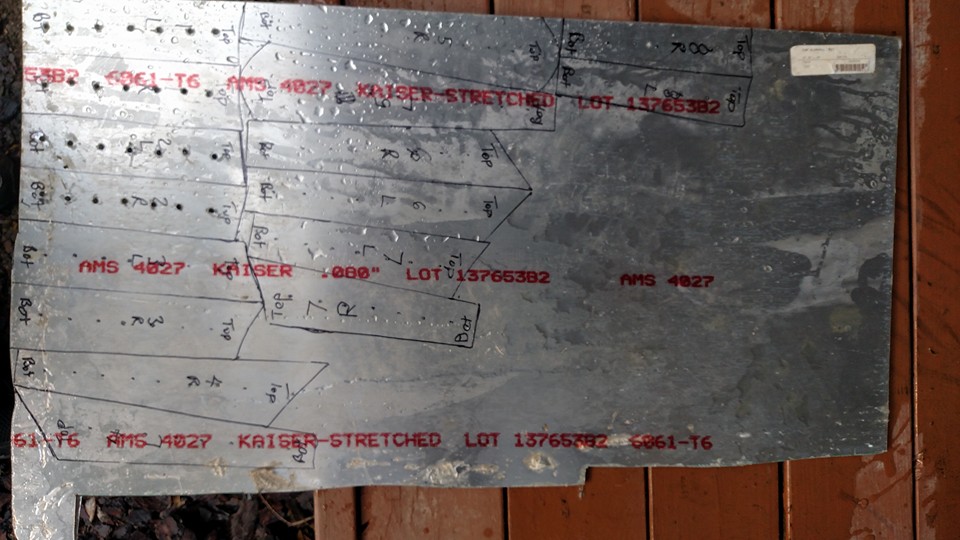
Drill the holes before cutting out the pieces. We used a ¼ inch drill bit. Make sure that the rivets you have will fit through the holes without too much extra space, but not too tightly.
Cut out each piece with the jigsaw. Snip the corners with tin snips, and grind the edges with your belt sander, using 80-grit sandpaper. Ream out the holes with a reamer. You want to get rid of any sharp edges that could wear on the leather legs (or on you!)
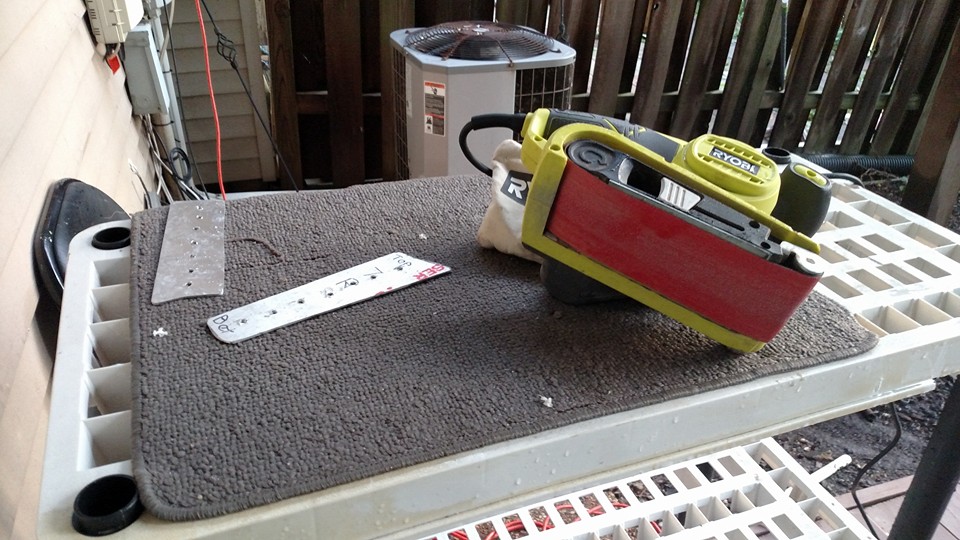
Sand the edges and corners with a belt sander to remove rough edges
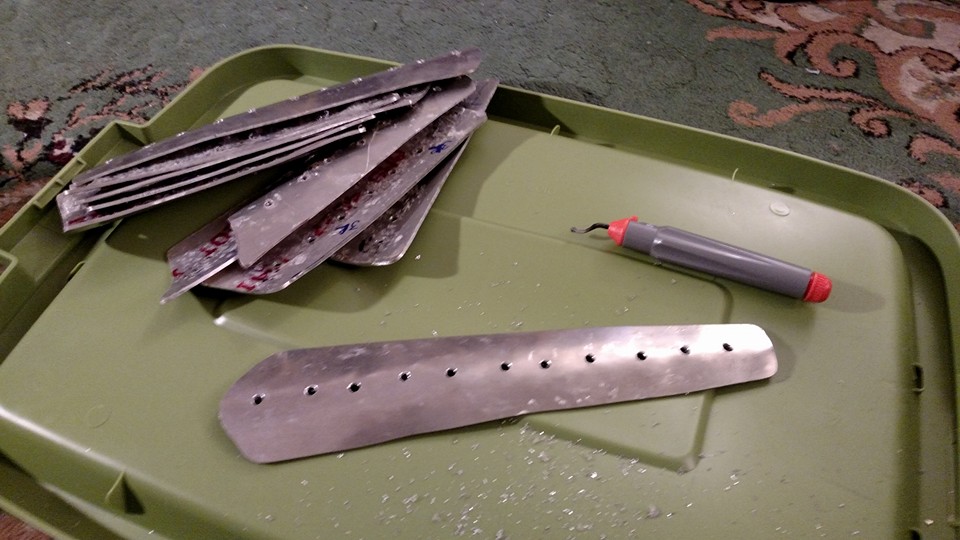
Use a deburring tool to remove burrs from the drilled holes
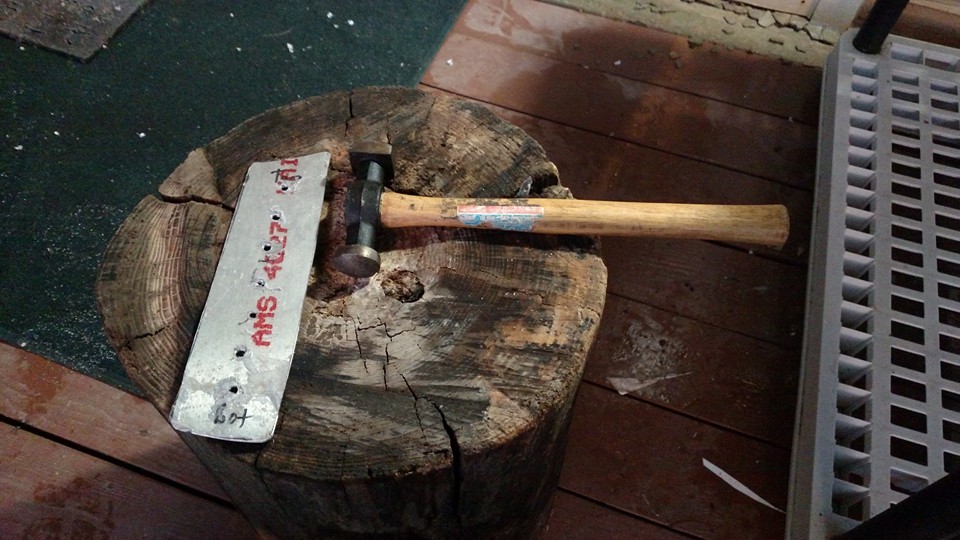
If possible, you will want to curve each plate a bit for comfort and fit as it wraps around your leg. If you can find a wooden stump, create a groove in it with a belt sander and/or carve out the groove with a chisel. Take each piece, and hammer it into this groove with a ball peen hammer to shape it. (It’s best to try this on a couple of scrap pieces first to get the hang of it.)
Testing the fit
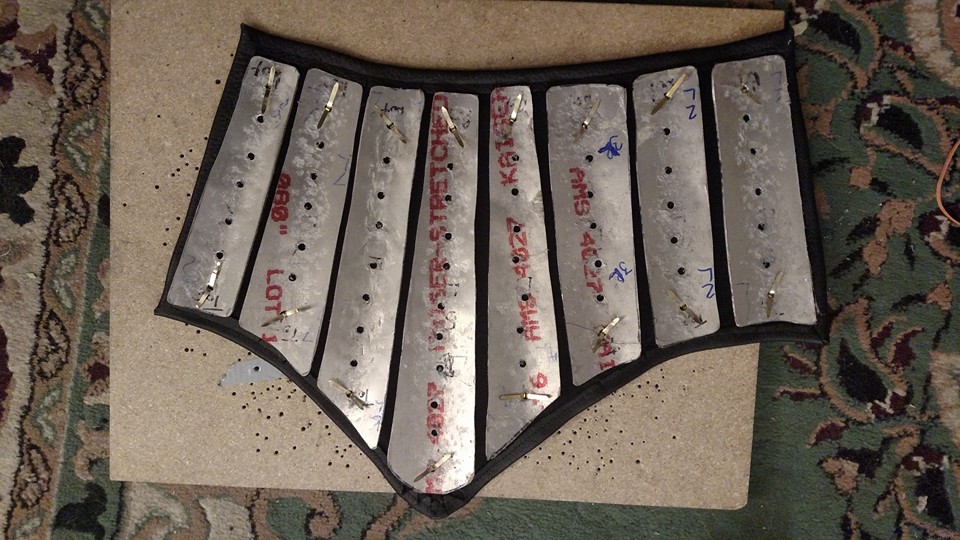
Lay the aluminum pieces down on the leather on top of a piece of wood. There should be some space between each aluminum piece, and a bit of room around the outside edges.
Using your scratch awl and a hammer, hammer through the top and bottom hole of each plate, through the leather, into the wood. With the awl, stretch the hole a bit. Then slip a brad through the leather and the plate at the top and bottom, splitting the two metal pieces of the brad to hold the two together. Once you’ve done this to all eight pieces, hold it up and wrap it around the leg. Make sure that the aluminum pieces fit and don’t bind or lock along the edges. If it is too stiff and won’t bend to wrap it around your leg you will need more space between the metal plates.
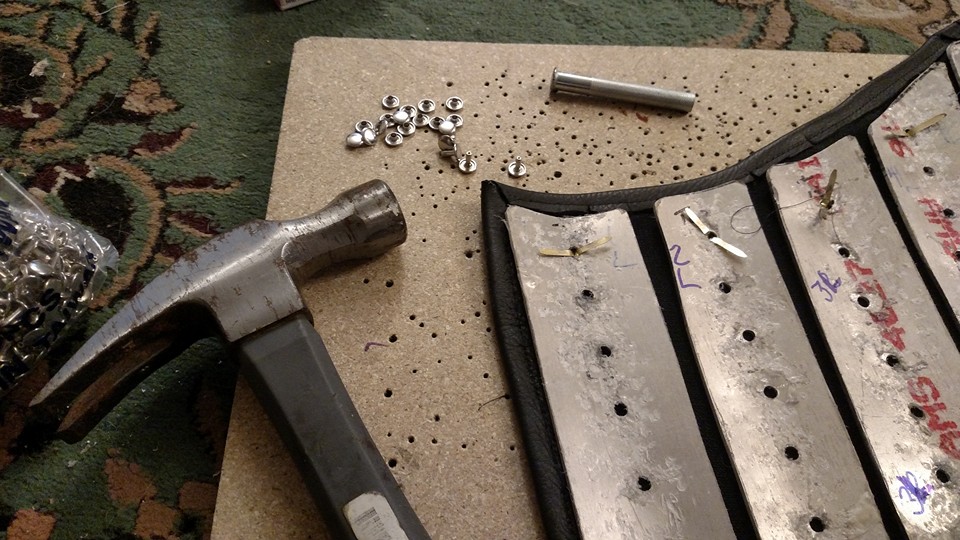
Riveting the metal plates
Once you’ve confirmed that everything fits, replace the brads with rivets. Rivet the top and bottom hole of a plate. Then hammer the awl through the other holes, poke the awl back through from the leather side to stretch the hole, and put in the rest of the rivets for each plate.

Leave a Reply