How to do the Holbein / Double Running Stitch
By Claudette Ziemann (SCA: Lady Bronwen Arianwen of Rivenwood Tower, OW)

This lesson will give you the basics of the Holbein (Double Running) stitch used in reversible Blackwork.
Here is the pattern for your first exercise. A straight line is the easiest place to start and end your thread. Keep this in mind when planning out your future projects.

Start in the center of where you want your line to be. Come up through the fabric at 1. Don't forget to leave at least a three-inch tail of thread on the back... and don't tie any knots! You will be weaving this tail in later so that it will not show. While holding the tail out of the way, go down at 2, up at 3 and down at 4.

Come up at 5, down at 6, up at 7, and down at 8. Take note of the diagram below to prevent gaps in your stitching.
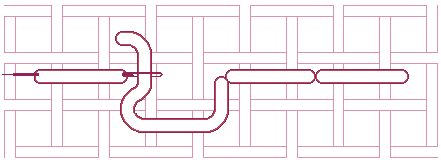
Look closely at the picture above. The needle actually pierces the thread to provide a consistent line with no gaps in the stitching. You will not want to pierce the thread in the exact middle of the thread. Doing this can split the fibers of the thread and cause a gap in your thread. Pierce the thread about 1/3 of the way over from the edge of it. This should create a nice, even line
with no gaps. It is especially important to pierce the threads when turning corners to avoid having a break in your line of stitches.

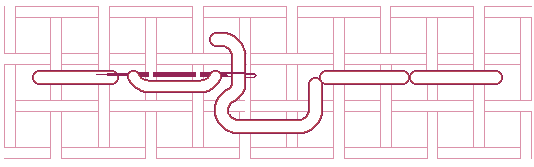
Continue going back along your line, coming up at 9, down at 10, up at 11 and down at 12.

Now you'll fill in the last little bit. Come up at 13, down at 14, up at 15 and down at 16.
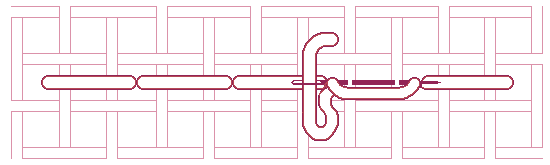
If you flip over your work, you will see that the line is the same on the front and the back, except that one stitch is missing. While still holding your little tail out of the way, use your fingernail to push down the stitches a little bit like in the diagram above. Run the needle through the threads of the fabric- try to do this through three or four threads if you can to anchor the thread completely. This will fill in the stitch that is missing and also hide the ends of your thread.
Unthread your needle and thread it with the tail you left when you started. Weave this in the same way you did the previous thread, only in the opposite direction.
Tug both of the threads in opposite directions slightly to even out the tension in the thread. Trim your tails very close to the fabric, being careful to not cut the stitches or the fabric.
This will produce a line of stitching that should be virtually identical on the front and the back.
It is possible to use this same method for ending threads under diagonal stitches, but it will take a bit of practice. Always try to start and end under a straight line for the neatest finishing.
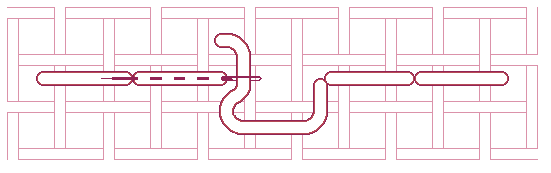
An alternate way of hiding the ends of your thread is shown above. The needle just pierces the threads instead of moving the threads out of the way. It is not quite as sturdy but is still a very good way to finish off the ends if you are unable to do the first method. Hint: if you are able to pierce the top of the threads of the fabric as you do this method, it will be much more stable. This second method is easier to do when finishing threads on a diagonal line.
Once again, tug both of the threads in opposite directions slightly to even out the tension in the thread. Trim your tails very close to the fabric, being careful to not cut the stitches or the fabric.
Back to Bronwen's Blackwork Library