The Effigy Corset Reconstruction
Based on The Effigy Corset article
 by Gwynne (J3kasper@aol.com)
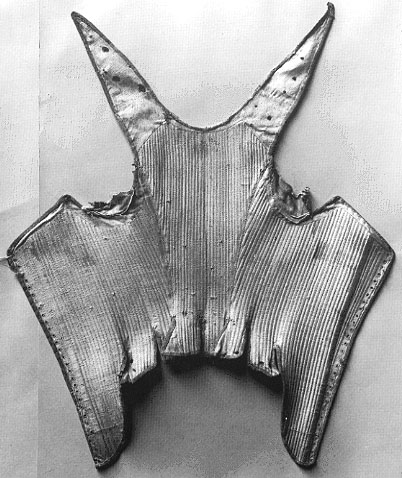
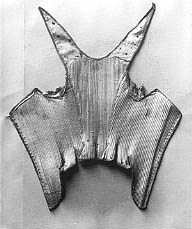
When the Westminster Abbey effigies were recently removed and cleaned, the Elizabethan corset was examined by Janet Arnold. Mistress Drea of the MidRealm let me in on this secret, and let me see her own recreation of it. Caveat emptor I have tried to simplify the engineering of this corset into some geometry and basic math based on one photo of the garment and one fondling session with Mistress Drea’s recreation! While it worked for me, you may need to tweak it a bit.
To see photos & diagrams of this corset, check out Drea's article The Effigy Corset: A New Look at Elizabethan Corsetry.
STEP ONE -- Measurements
A popular TV home show says to measure twice and cut once. I generally measure twice, cut twice, fix it and cut again, but that's the nature of making a sloper and fitted pattern! You will need to have a good friend (or an evil one, depending on how honest you want to be) get the following measurements for you:
- Bust (at the widest point) minus two inches for standard busts, four for large (this is the ‘squish' factor and is variable)
- Waist (ditto, or the narrowest point, depending on how you are built) but do not subtract anything here or you will be uncomfortable and risk breaking the lower ribs
- Back length (the whole thing from base of the neck to the waist)
- Strap length (from spine/waist intersection in back up over the shoulder to pit area in front where the strap will join the front of your corset. Add two inches for lacing)
- Bust point -- how far up from the spine/waist intersection the widest point of your bust lives at. Depending on your body, it could be at the pit level or slightly above or below it.
- Front length -- from your belly button up to about how high you want the front of the corset. French corsets are low-cut; English corsets tend to be higher.
STEP TWO -- Patterning the back
You can start with the front, if you'd rather; I just did the back because it has more straight lines. Keep in mind that you can make a ‘half pattern' (cut one on fold) rather than a ‘whole pattern' (cut one). If you are fairly symmetrical, the half pattern works best.
- Start at the bottom of your sloper (paper or fabric, it's up to you). This is where the spine and the waist are going to intersect (center back/waist). Make a dot so you know where you are, and remember to start about four inches from the bottom of the sloper for tabs!
- Take the WAIST measurement and divide by four. This is the entire width of the lower back, so you only need half of that number to get you from the dot to the edge of the back pattern. Mark this point on the sloper (you can draw a line if you want).
- From the original point and at right angles to the waist line you just drew, measure up the back and mark the BACK LENGTH. Draw a straight line (for the fold).
- On the line you just drew, measure up from the original point and mark where the BUST POINT goes. Make a dot or an x or something to mark the spot.
- Take the BUST measurement (remember you took something off for ‘squish') and divide by four.
- At right angles to the center back, draw a line from the BUST POINT marker across to the edge of your BUST.
- Draw a fairly straight line to connect the BUST you just finished with the WAIST you finished in step 2.
- THIS IS THE TRICKY PART. The strap needs to go at about a 45 degree angle from the bust point/center back marking to the end of the strap. I use the grid on my cutting board to draw a line along this 45 degree angle.
- From the spine/waist intersection (yes, way down there) measure the STRAP LENGTH up and out. You should intersect with the 45 degree line where the end of your strap length is. This is the point you want to mark; it is the tip of the strap, which will lace into the front/pit of your corset.
- Do the dot-to-dot. I start at the center back/neckline and draw a shallow curve up to about the shoulder, then angle quickly up to the strap end, then back down along the edge to the bust point. From the bust point to the waist is a fairly straight line, and should eventually be about the same angle as you get for the edge of the front!
- Cut it out, leaving the extra four inches of fabric at the bottom for the tabs which will be helping to hold out your skirts in the back.
Take time out for a Pepsi, Coke, iced tea, hot tea, or vodka and lemonade. You deserve it!
STEP THREE -- Patterning the front
- When patterning the back, you took your waist measurement divided by four. You will now take this number and multiply it by 1.5 (one and a half). Trust me -- you end up with ¾ of the pattern in the two front pieces and ¼ of the pattern in the back, which makes your seams run down the shoulder blades in a very nice, period manner.
- Starting at the waist/center front point and leaving about a foot to the bottom of your sloper (for the extended waist point of the corset), make a spot about where your belly button is. This is the center front point.
- From this point, measure out to the side and mark where the waist ends. (This is the waist divided by four times one and a half figure from #1 above.) Draw a line so you don't forget what you have going here.
- From the center front (belly button) point, measure up the FRONT LENGTH and mark where the top of your corset is going.
- Take your bust measurement divided by four times one and a half (just like the waist, only use the bust). Measure out from the center front and mark this at right angles. This should be the top of your corset (give or take a little). Draw a line.
- Connect from the side waist line to the corset top line. You will now have to eyeball how big your pits are and sketch it in so it looks somewhat like a polearm blade -- a halberd, for example -- or an old-fashioned can opener (the hook variety).
- Stop and have a look at the side front and side back patterns. These should be at about the same angle, as the pieces will overlap when you put them together. A little give and take is OK!
- Sketch in the bottom of the front. You need to measure down from your belly button to determine how long you want the front point to be. Depending on the time period, it could be flat (Tudor) to about three inches (early Elizabethan) to about 8-10 inches (very late period). Keep in mind what type of gown you will probably be wearing this under, and don't give yourself a huge point if you are to wear Tudor.
- If you want tabs sticking out on the front, remember to sketch them in. I leave a gap right over my hip bones so I don't end up with things digging me in the boniest part of my hips. If your gown is to be flat across the front, don't put tabs in!
- Cut it out. Cut it out again (you have two fronts, you know).
Have another drink (or two). Take a good gander at the three pieces you now have before you. Your life depends on these!
STEP FOUR -- Basting and Fitting
This is standard sewing; the tough part is done! Just baste the sides of the fronts to the sides of the backs. In fact, you can use duct tape to hold it together to make sure your pieces are engineered correctly! You want the fronts to meet without overlapping, and the straps to run along the bias to the edge of your armpit. Make any necessary adjustments to the sloper, remove it, repattern as needed, and then move on.
STEP FIVE -- The real thing
Now you cut the fronts (2 of each) and back (2) out of your fabric. If you are using something which is not as heavy as a 100% duck or twill, you will need to make 8 fronts and 4 backs, and put the boning in the center of the layers.
The following is a good process to follow, but you will undoubtedly find other ones which work as well!
- Baste the two left fronts together along the edges. Ditto the right fronts, and the back. Leave the bottom edge open for the boning to go into.
- Quilt the fronts, using the straight center front as a guide. If you use the presser foot edge as a quilting guide, you will end up with channels which will easily hold two 3mm reeds (bents).
- Ditto the backs, running the first line of stitching down the straight center back.
- Sew a holding line about an inch down from the top edge. This stops the bents from going all the way to the upper edge, and gives the line so often found in Elizabethan portraits.
- Use extra wide double fold seam binding (or make your own, or use leather if you are ambitious) and bind all the open edges except the bottom. (I machine stitch unless I am going to enter in a competition!)
- Put in eyelets along the center fronts. I put them about 1 -- 1 ½ inches apart so that they don't gap easily. If you are bone flat, you won't need to put them that close together, but if you are extremely busty (or move around a lot) you may want them closer. Don't go too close -- you can end up tearing the fabric.
- Bone it. You can stuff in as many bents as you can get into one channel, but make sure you leave the first channel open in the front for eyelets!
- Stitch it together. This is done by overlapping the front sides and the back sides, then whipstitching (or whatever stitch turns you on) to get the one firmly attached to the other. Yes I know it looks funny and doesn't seem right, but Mistress Drea tells me this is how it works and if you are careful, it is fairly sturdy!
- Try it on. Yes, at last! If you have boned too much (ie: it took up too much space), take some of the bents out. I remove one from every other channel (doing the back first, as I don't need extra support there) until it fits more smoothly.
- When you have the bents increased or reduced so it fits just the way you want, finish the bottom edge by binding it.
You are now done! Add eyelet holes at the pit area and the end of the straps, make sure you tied all the threads off and cut them flush with the fabric, and take it out for a test spin under your favorite late-period gown! Get ready for breathless compliments and awe-stricken looks.
If you have questions or comments on this article, you can contact me at J3kasper@aol.com